10 Button Behavior

Button Behavior
Button Behavior

10.1 Double-Click Option

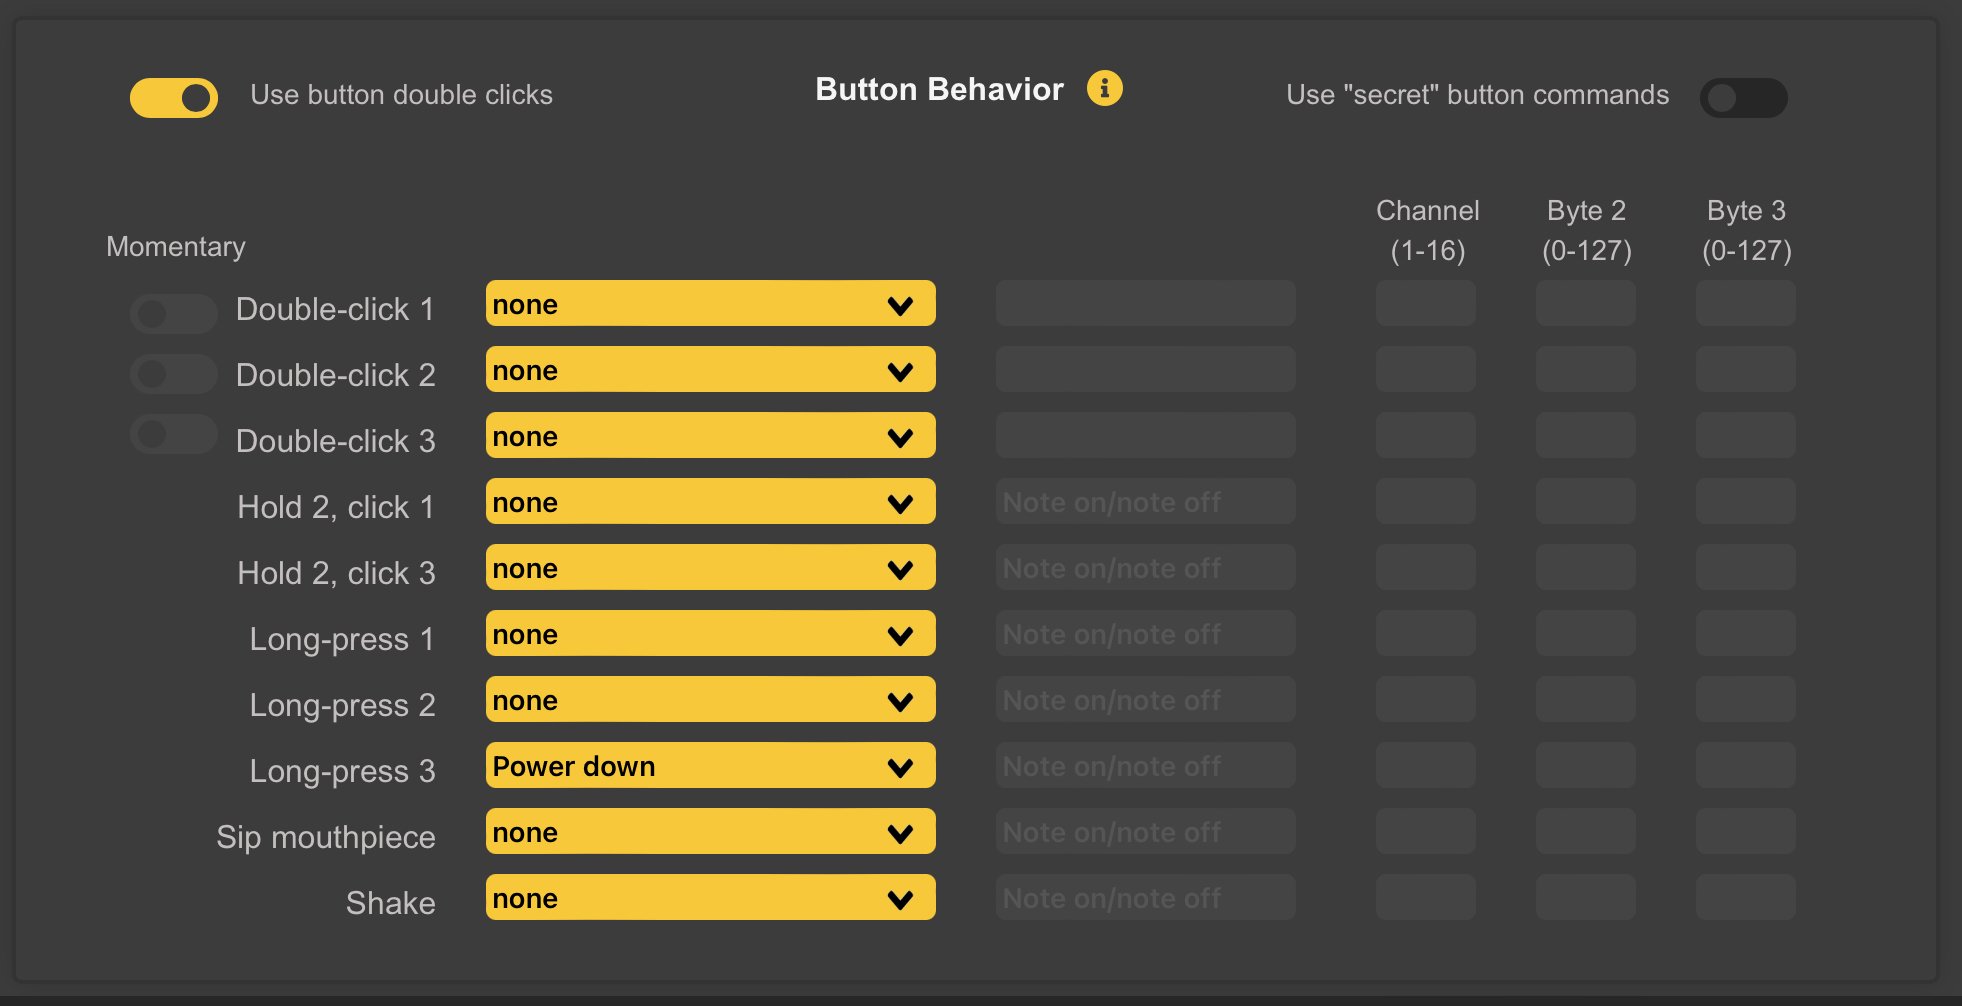
A toggle switch at the top left of the Button-Behavior Screen (see above) enables the Double-Click Option. This applies to the first 3 gestures (slots).

  • When active, the corresponding action will take place only after a Quick Double Press of the button.
  • This is intended to avoid Accidental Clicks while playing.
  • When enabled, the Momentary Option takes precedence.

10.2 “Secret” Button Commands

A toggle switch at the top-right of the Button Behavior Panel enables additional Hard-Coded Actions that involve Covering Certain Tone Holes while clicking WARBL2 Button 1.

These can be useful if Normal Button Actions are used for Other Functions, giving an alternative way of Changing Slide/Vibrato Mode and Instrument.

With the Use Secret Button Commands turned On:

  • Covering only Tone Hole L3 while pressing WARBL2 Button 1 will change the Slide/Vibrato Mode, and
  • Covering only Tone Hole R3 while pressing WARBL2 Button 1 will change the Instrument.

Note: The Use Secret Button Commands switch does not have to be ON to use the Secret Drone Control Button, if that option is selected in the Drones Control Panel.

10.3 Button Actions

WARBL2 Buttons 1, 2, and 3 can be programmed to perform different actions. This is useful for sending special Commands to MIDI Apps, or customizing the ability to Switch Modes.

Note: It can be confusing if you assign different Buttons Actions in the three different Instruments, so it may be useful to use the same Actions in all three.

10.3.1 WARBL2 Actions

New to WARBL2 are 2 Additional Actions included with the Button Actions to trigger Commands:

  • You can either “sip” the Mouthpiece, or
  • Shake the Device.

Because these are both relatively easy to do accidentally, it is recommended to only use these for commands that won’t have adverse effects or cause confusion if triggered accidentally, e.g. Re-Centering Yaw or MIDI Panic.

If a WARBL2 Button Click is configured to send MIDI Note On/Note Off Messages, the normal behavior is to alternate between sending Note On and Note Off Messages each time the WARBL2 Button is Pressed.

Note: The Action actually occurs when the button is Released.

10.3.2 Momentary

There is also the option to choose Momentary behavior: the WARBL2 Button will send a Note on Message when pressed and a Note Off Message when released, useful if you only want a Note to be on when the WARBL2 Button is held Down, for example for mimicking Uilleann Pipe regulators.

Note: If Momentary is Selected, other Actions using that same Button will be Disabled, because it’s not possible to differentiate other intentions from a Momentary Press.

10.3.3 None

No action will result if a WARBL2 Button is pressed.

10.4 Send MIDI Message

10.4.1 Note On/Note Off

If you are sending Note on/Note Off Messages:

  • byte 2 is the MIDI Note Number, and
  • byte 3 is Velocity

10.4.2 CC Messages

If you are sending CC Messages:

  • byte 2 is the CC Number, and
  • byte 3 is the Value

Note: CC Messages 102-119 on Channel 7 are reserved for the Configuration Tool, so WARBL cannot be programmed to send additional messages in this range.

10.4.3 Send PC

Selecting this will send a Program Change Message to the selected Channel, useful e.g. to Select a Particular Instrument in a MIDI Host App.

10.4.4 Increase PC and Decrease PC

These assume a Program Change value of 1 when WARBL2 is started, then Increase or Decrease it from there, e.g. clicking a WARBL2 Button assigned to Increase PC after starting WARBL will send a PC Message of 2 on the selected Channel.

These commands are useful for Consecutively Stepping Through Available Sounds in a MIDI App.

10.4.5 Additional Momentary Switches

Momentary Switches are available when you have selected:

  • Octave Shift Up
  • Octave Shift Down
  • Semitone Shift Up, or
  • Semitone Shift Down.

This allows you to use a WARBL2 Button to momentarily shift the Octave or Key, extending the range of the Instrument and allowing any WARBL2 Button to act as a “key” for Sharpening or Flattening a Note.

10.4.6 Auto Callibration

A WARBL2 Button can be assigned to begin Auto Calibration. This can be useful if you anticipate needing to auto calibrate when you don’t have access to the Configuration Tool.

However, you’ll want to use a WARBL2 Button combination that can’t be Triggered Accidentally, for example holding WARBL2 Button 2 and clicking either WARBL2 Button 1 or WARBL2 Button 3.

Also, when you begin Auto Calibration with a Button Combination, you need to be careful not to cover any of the Sensors while pressing the WARBL2 Buttons, because if you are pressing firmly on the Sensors when Auto Calibration begins it will give WARBL incorrect examples of covered Sensors.

10.4.7 Power Down

By default, a long-press of WARBL2 Button 3 will power down the WARBL2. If you’d prefer not to use a button to power down, you can choose to let it power down automatically (see the WARBL2 Settings Panel).

10.4.8 Recenter the Yaw

Recenters the Yaw.

10.4.9 Show Battery Level

When triggered, will blink the LED Turquoise from 1-10 times according to the Battery Level Percentage. If the Battery Level is lower than 10%, the LED will blink Red once.