5 Instrument Settings
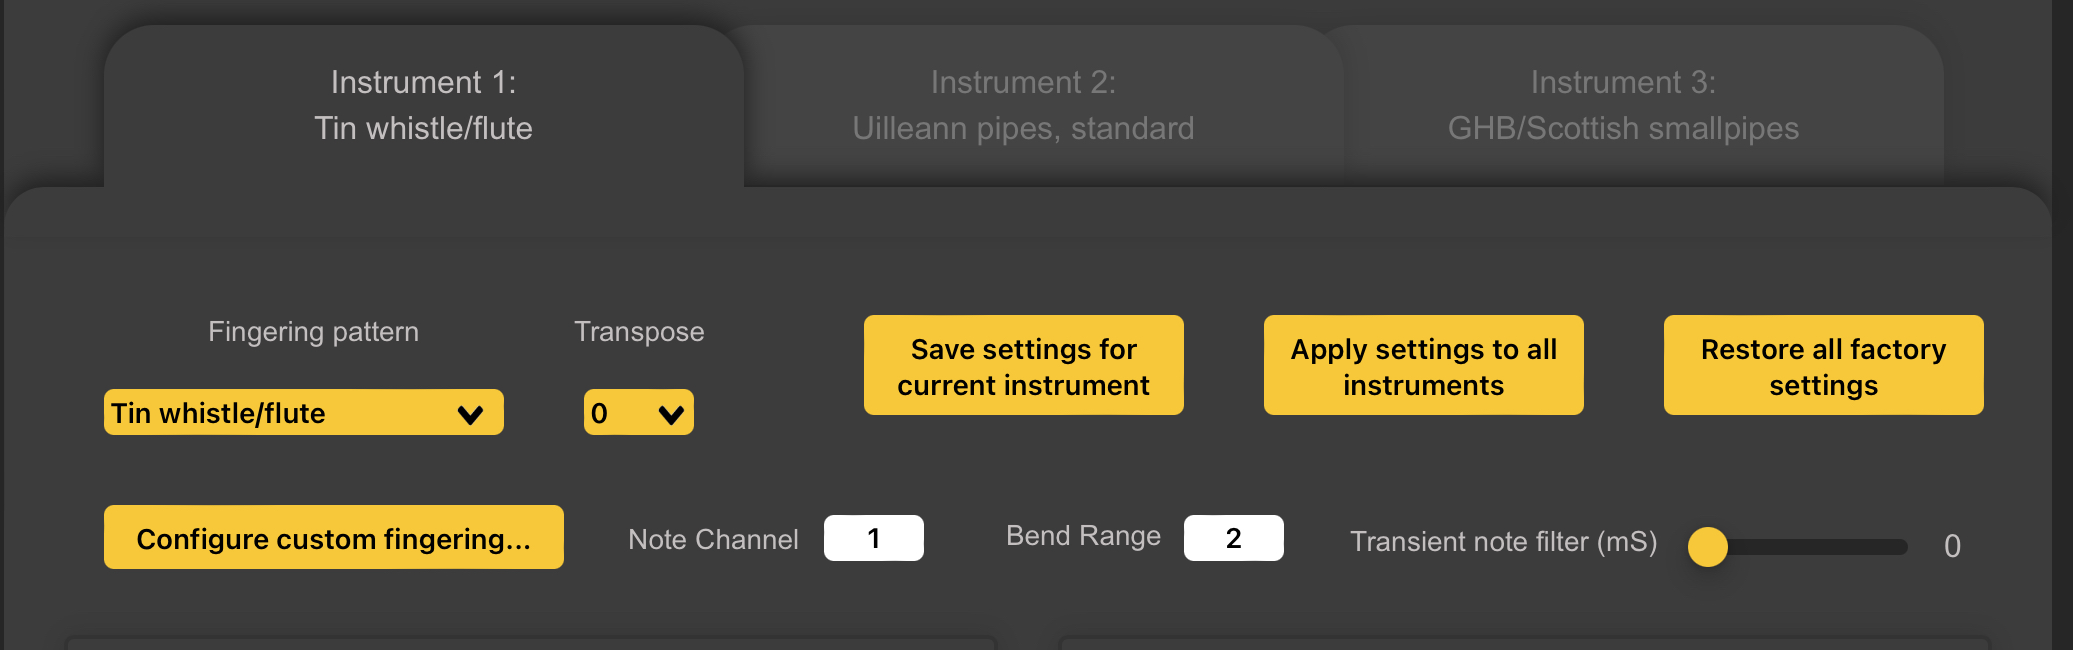
WARBL has three Instruments available for use at any time, accessible by three Instrument Tabs. Each Instrument consists of a Fingering Pattern and a set of associated Settings. You can select different Fingering Patterns for each Instrument, or you can select the same Fingering Pattern for more than one Instrument.
For example, if you only want to use Tin Whistle Fingering, you can select that option for all three Instruments, but still have three different sets of Settings available at any time. You may want to have the Settings configured differently for each Instrument, or have different Register Control and/or Slide/Vibrato settings.
5.1 Per-Instrument Settings
Selecting the Tab for an Instrument allows you to change the Settings for that Instrument. Please note that WARBL responds immediately to changes to settings for each Instrument, but if you don’t save them, those changes will be lost when you power down WARBL.
You can choose to apply changes to settings to the current Instrument (by clicking Save settings for current instrument), or
You can choose to apply them to all three instruments (click Apply to all instruments).
This can be useful if you want to make three Instruments that are the same except for minor differences (which can be changed after applying the Initial Settings to all three Instruments).
You can also Restore all factory settings.
5.2 Default Instrument
You can set the Default Instrument that will be active when WARBL is plugged in. This prevents having to click a button to switch instruments if your current favourite Instrument is not Instrument 1.
To set the Default Instrument, simply click the Tab for that Instrument and then click Set as Default. This change will be saved immediately. This button does not appear in the Default Instrument Tab
5.3 Fingering Pattern
The Fingering Pattern Dropdown Menu allows you to choose a Fingering Chart. Information about each chart is available on the Documentation web page. Note that there are four Custom Charts available at the bottom of the list (see Configure Custom Fingering below).
5.5 Configure Custom Fingering
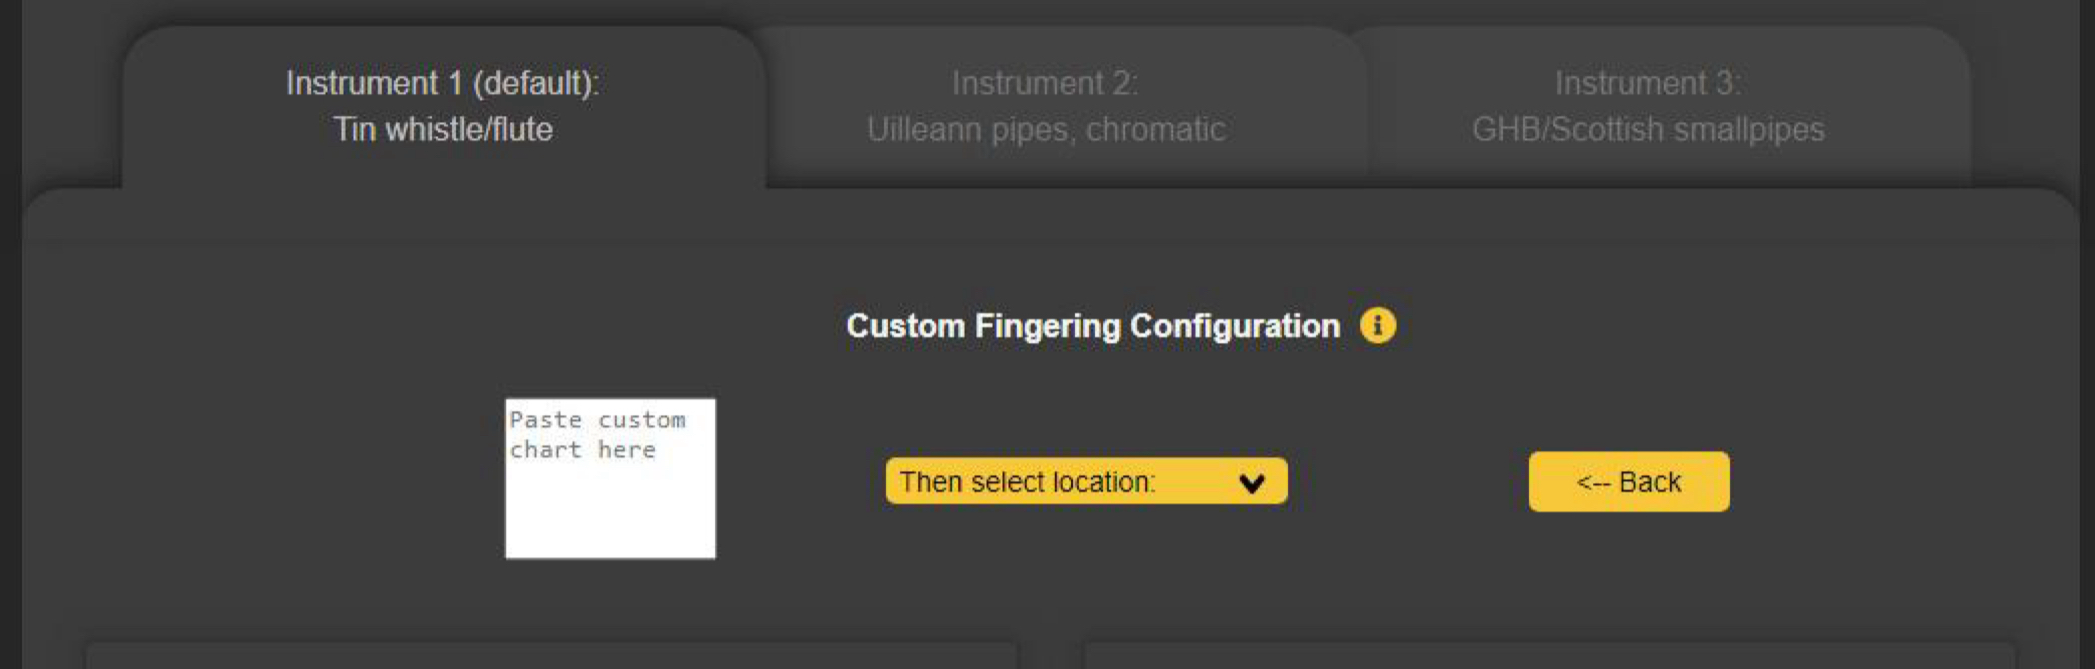
Tapping this WARBL2 Button opens the Custom Fingering Configuration Panel, where you can create Custom Fingerings. Tapping the <– Back Button will close this Panel.
WARBL2 has the ability to store up to 4 completely customizable Fingering Charts. Each Chart contains 256 MIDI Notes for every possible combination of the 8 tone holes (the Bell Sensor is not used).
You will be pasting a list of 256 MIDI notes and their Fingerings into the box on the left.
A special Google Sheet is available that will help you create your Custom Fingering Chart. A Link for the Sheet can be found on the WARBL Documentation Page.
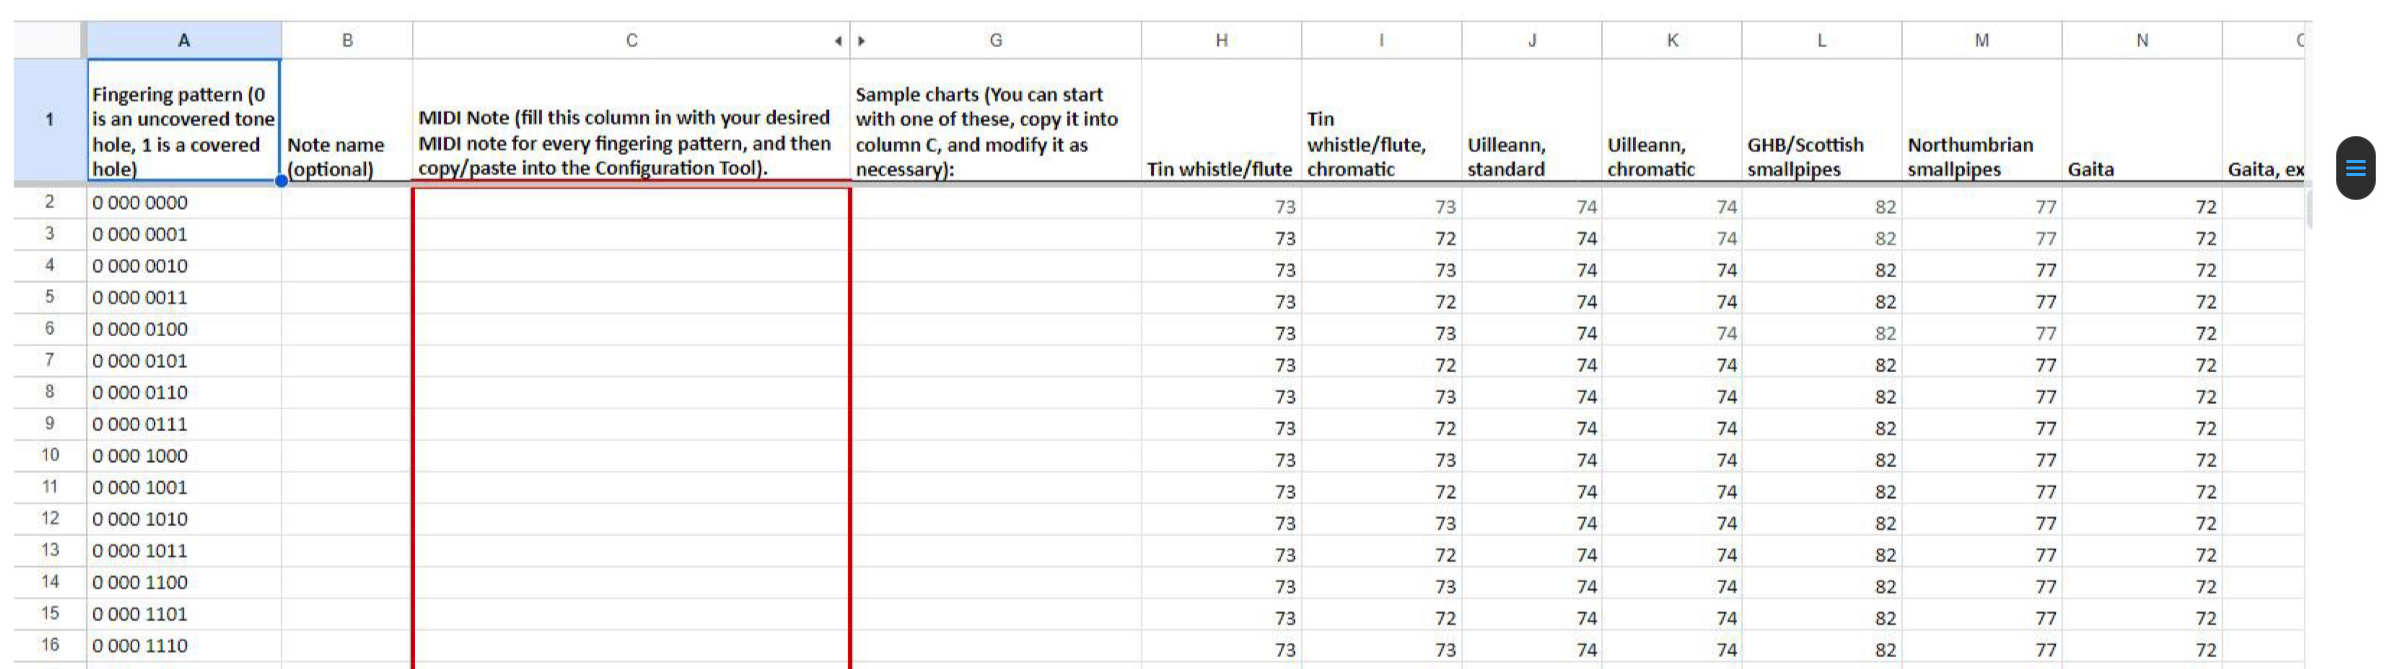
You don’t have to use this sheet but it helps simplify the process of making a Custom Fingering Chart. You’ll need to save your own copy of the Google Sheet so you can edit it.
More information about how to make a Custom Fingering Chartuse can be found in the WARBL User Manual (PDF) and in the WARBL2 Custom Fingering Charts Video on the Facebook WARBL Group.
Once you have made your List of MIDI Note Numbers, paste the values into the box at the left. Next, select one of Four Custom Charts in the center Then select location: dropdown menu as the location for saving the Custom Fingering Chart. (If you have previously saved a Chart in this same location it will be overwritten).
It will take several seconds to load the new chart onto the WARBL2. After you have done this, click the <– Back button, then select your Custom Chart from the Fingering Pattern dropdown menu (and Save Changes if desired).
5.6 Note Channel
Allows you to select the MIDI Channel (1-16) used for Sending Notes From WARBL. This should typically be left set to 1.
5.7 Bend Range
Is the number of Semitones of Pitch Bend that the WARBL will allow. This should typically be set to the default value of 2.
5.8 Transient Note Filter (mS)
Filters out very brief Unwanted Notes by adding a small delay in Milliseconds to the Tone Hole Sensors. This can be particularly useful when using Note Annotation Software to transcribe your playing. Without this delay, Very Brief Notes that you might not necessarily hear will be transcribed.
This can also be used to clean up the sound of your playing by removing Crossing Noises that occur while changing from one Fingering Pattern to another. Be aware, however, that because this Filter works by adding a delay; setting it too high will give a sluggish feel to your playing. Set it to 0 for the fastest possible Tone Hole Response.